This procedure assumes that you have opened up the relevant
‘ana’ file.
To set up an Analysis batch run:
- Select File > Batch Run.
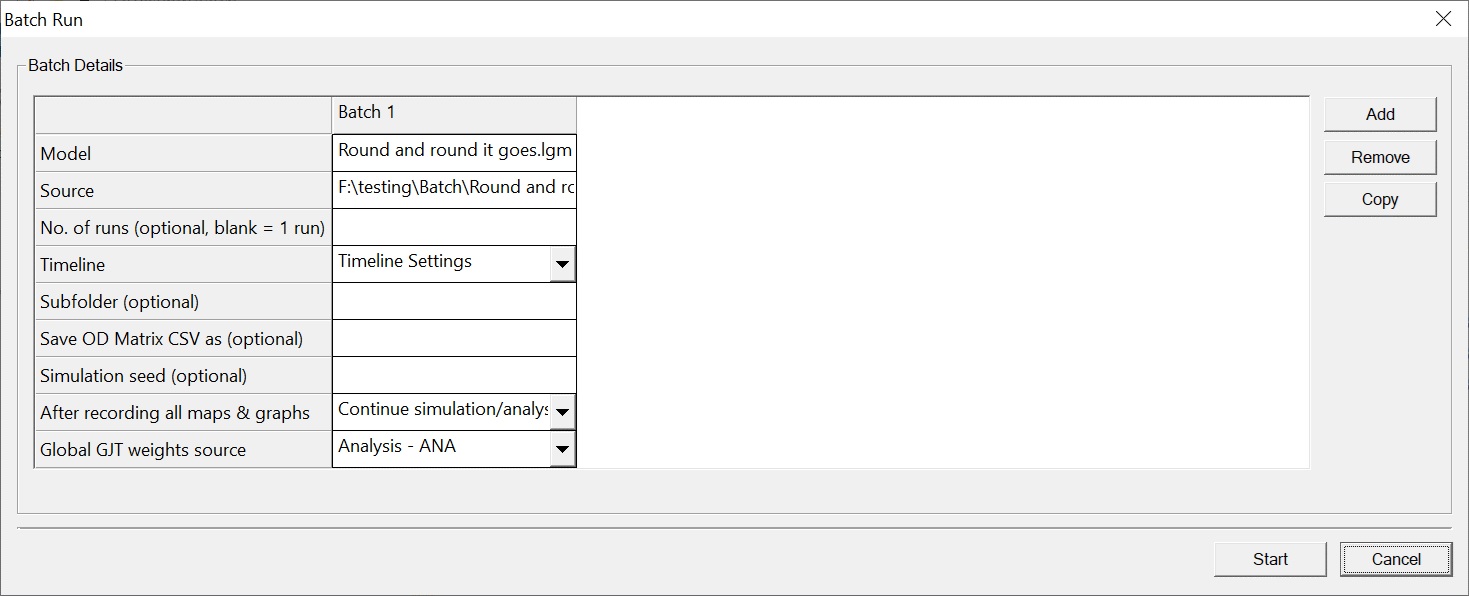
- The ‘Batch Run’ dialog
is displayed, with the first batch 'Batch 1' column already present. It
contains nine cells, arranged vertically, which you can use to define the
content of the batch run.
- Double-click in the Model
cell, navigate to and select the appropriate ‘lgm’ file.
- Double-click in the Source
cell, navigate to and select the appropriate ‘ora’ or ‘res’ file.
- Double-click in the No. of
runs cell and enter the number of simulations you want to run.
Tip: This
cell is optional. If blank, a single run is assumed.
- Select one of the available
Timeline Settings from the Timeline drop-down list.
Note: The name cannot
contain illegal characters (any of ?/*<>|\).
- To save the results of the
Batch Run or Runs in a subfolder within the output location already specified
in the Timeline, double-click in the Subfolder (optional) box and type a name
for the folder. This folder can be:
- An absolute folder,
e.g. C:\LEGION\Batch Runs\
- A folder relative to
the Project Base Folder (see Creating an Analysis Project).
Tip: This cell is optional. If blank,
output is relative to the Project Base Folder.
- To record the simulation OD
Matrix after simulating/analysing the batch item, double click in the Save OD
Matrix CSV cell and type the name of a CSV file to save the simulation OD
Matrix to.
Tip: This
cell is optional. If blank, a simulation OD Matrix CSV is not saved.
- To run a simulation using a
particular seed, double click in the Simulation seed box and enter the number
of the seed. For more information on simulation seeds, see
Specifying the
Simulation Seed.
Tip: This
cell is optional. If blank, a random simulation seed is used for each run.
- To instruct runs how to
proceed when they have recorded all relevant maps and graphs, from the After
recording all maps & graphs drop-down list, select either:
- Skip to the next batch
item
- Continue
simulation/analysis
Tip: Making a selection here can save
you time if you don't need to record video or res files after the data for maps
and graphs have been recorded.
- To select which global GJT
weightings to use (the lgm file's or the ana file's), from the Global GJT
weights source drop-down list, select either:
- Model – LGM
- Analysis – ANA
Tip: Making a selection here ensures
that the Batch Runs continue without being interrupted by LEGION Simulator
requesting to know, each run, and which weightings to use.
- If you want to add more
batches, do one of the following:
- Click the Add button to
add 'Batch 2' to the dialog and return to step 2 of this procedure.
- If you want to use this
batch as the basis for a further one, click Copy and return to step 3 of this
procedure to alter one or more of the settings.
Note: To remove a
batch item, click once on its column header and then click the Remove button.
- To run a batch (or
batches), click Start.
- The Batch Run progress
indicator is displayed. It will close when all files are completed and saved to
your specified location.